I've been making my own soap for a while now, as unfortunately most
store-bought soaps don't agree with my skin :(. I recently did another
batch of Castile soap, which is a very mild soap (my quantities are adapted from
The Complete Soapmaker by Norma Coney). I generally find that the amount of
water required by the original recipe is slightly excessive, and by using a bit
less (but not too much - unreacted lye is caustic and can burn you) the reaction occurs more quickly, which means less time waiting for the
soap to finish.
 |
| Cured Castile Soap |
Equipment:
- 1 large (and not very valuable) container (e.g. paint bucket, old cooking pot)
- Measuring scales
- Measuring jug
- Battery powered drill + paint stirrer (or alternatively a stick - but this does get a bit tiring)
- Metal ladle (or similar instrument to assist in transferring the soap liquid to moulds)
- Moulds (I use metal and silicone muffin trays - both regular shapes and fun ones, as well as any containers I think will work well)
My Preferred Quantities: (these can be scaled up or down, doubled/halved etc.)
- 6L extra virgin olive oil
- 26 oz lye (sodium hydroxide) (available in supermarkets/hardware stores - look under drain cleaners, and make sure that it doesn't have any additives)
- 1.7L tap water
Makes approximately 70 soaps.
REMEMBER - lye is caustic, and as such it is best to wear safety glasses
and gloves. If you do get any lye on your skin or in your eyes,
immediately wash it off with cold running water.
Method:
- Measure out the required quantity of lye and place into the bucket. Then add the measured quantities of water and oil.
- Stir until well combined using the paint stirrer in an electric drill. As the lye reacts with the water it will become very hot (up to ~90oC).
- Stir the mixture occasionally (e.g. every 2 hours) until well combined (the mixture will separate, with an oil layer on top). Once the mixture no longer separates it is ready to pour. The time it takes to reach this stage depends on a number of factors (e.g.temperature), but I find it generally takes 4-5 days before I'm satisfied with the mix.
- Pour the mixture into the moulds.
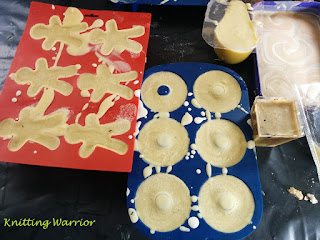 |
| Soaps setting in moulds |
- Wait for the soap to set. Depending on the mixture's readiness at the time of pouring, a thin film of oil may appear on the surface of the soap in the moulds. Don't worry about this, as it will be absorbed back into the soap as it sets. Again the time taken for this stage depends on a lot of different factors - but it will take at least a week to set. Gently feel the soap, if it feels hard try removing it gently from the mould. If this is successful and the soap feels hard on all surfaces - it's done. Otherwise, just wait a bit longer before trying again.
- Leave the soap out of the moulds and spaced apart on a flat surface for 1-2 weeks to cure and become very hard (or if you don't have room, just carefully stack them in an open container and place them out of the way to cure).
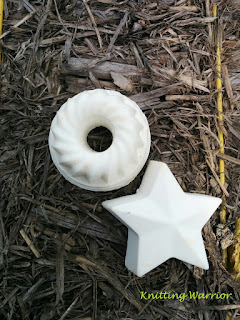 |
| Cured Castile Soap |
If you're feeling adventurous, scents and colours can also be added at step 4. Just remember that the colouring agent may also dye your skin - so avoid blue food dye and similar substances. :) In the past I've tried essential oils, leaves, fruit, cocoa powder and oats. Unfortunately, because the chemical reaction is still happening at this stage, the scents from essential oils and plant matter (e.g. lavender leaves and lemon zest) don't have a strong effect, but they do give a slight smell which is quite nice and not at all overpowering (a few drops of essential oil in each soap mould).
I've also added oats to some of my soap to try and get a scrub-like effect, however the oats turned slimy and mushy ... not the effect I was looking for.
A few tablespoons of cocoa powder in about 500mL of soap liquid results in a medium brown colour, which can then be swirled through the regular soap liquid to get a nice visual effect. I've tried this method in my most recent batch - and it seems to have worked quite well :D And of course, hand-milling plain soap once it has set also allows the addition of scents and colour, with a better overall result.
 |
| Cocoa Powder Swirl |


